Friday, October 28, 2011

I Heart U!

Happy Friday!! Well this week we took a little girl Hannah to have a test done (Barium Swallow) at a Hershey Medical Center. We stayed over night since we are 3 hrs from the hospital and she couldn't have anything to eat or drink 4 hrs. before. The test went great! She didn't like to be held down for ALL the x-rays but she did wonderful! The test showed she has reflux so they upped her meds and we are praying they work. SO I did this layout for her!

I used all Hambly on this one.


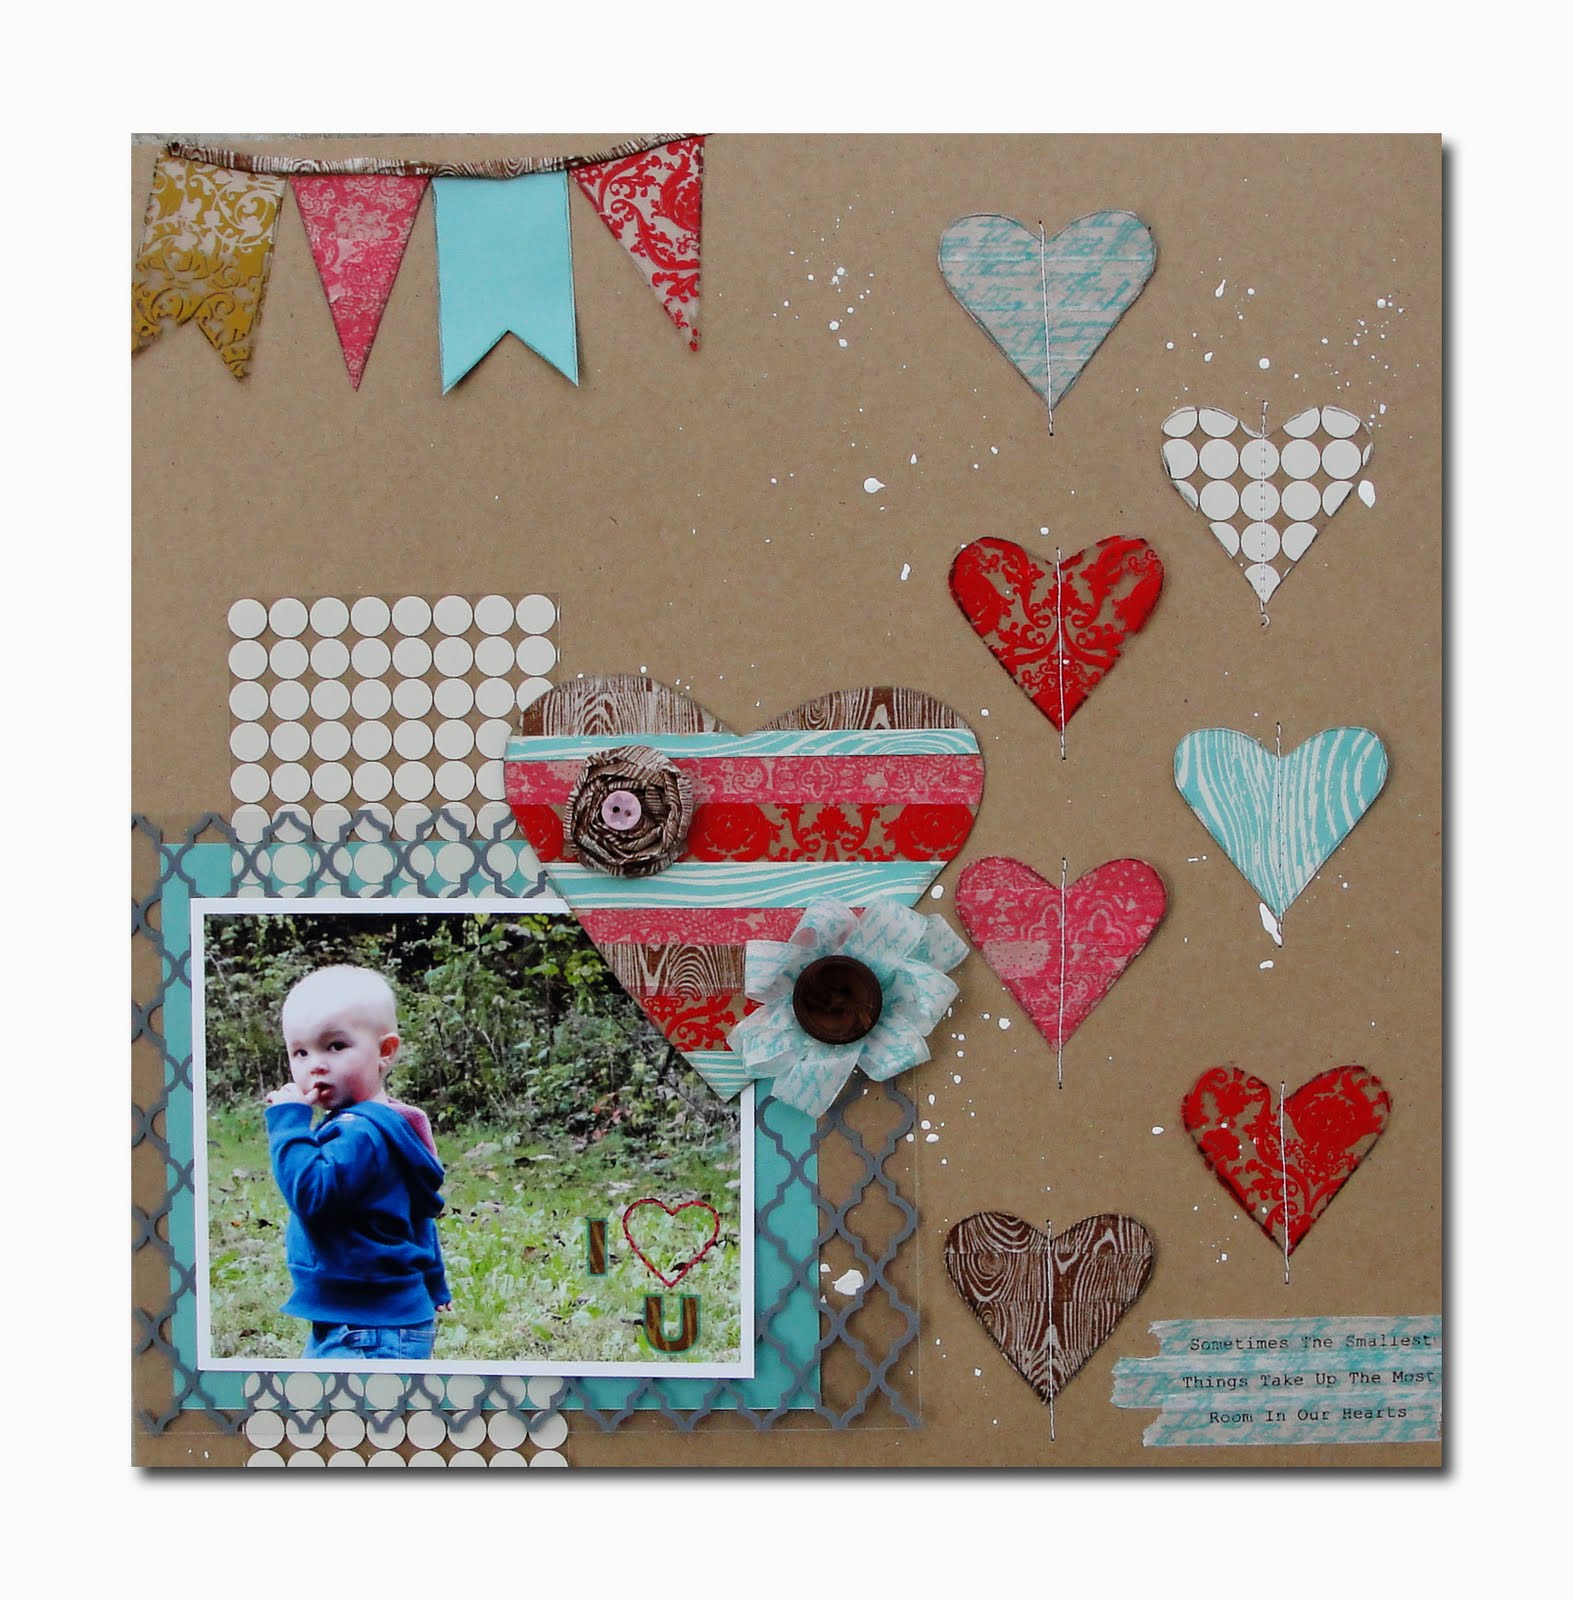
I first cut out little hearts from the screens and some I used the washi tape and covered them and cut around them. I then machine stitched down the middle of each heart.

http://www.blogger.com/img/blank.gif
I then cut out a BIG heart and layered it with stripes of paper, screens, and washi tape. I made the "bow" flower by wrapping the tape around and around till I got this flower look.


Here I took a circle and made a "rolled" flower out of the washi tape.


I found this say on Pinterest. Love this!


I used the Hambly alphas and I hand stitched the heart.


And last but not least the cute little banner.


And here is a picture of my little peanut after her test. They gave her the Care Bear pillow case for being so good!

Monday, October 24, 2011

A Day Out

The other day my hubby had to go into work for 2 hrs. so we went with him (he work an hr away) and while he was at work I took the kids to our favorite ice cream place, Meyer Dairy. They make their own ice cream and still have milk in a glass bottle. I chose to use some Hambly, Pink Paislee, Lily bee, and some Prima.


Here they are together! Love the Washi tape from Hambly!

The alphas are Hambly and Sassafras. I used the Hambly stitch rubons to make it look like stitching. And the butterfly is from Prima and I misted it with Tattered Angels Mist.

I started laying the stripes of paper and it all fell together like this. I love the cute individual pictures I got of each of the kids. Don't you love Ty's blue tongue.

Thank you so much for looking!

Thursday, October 20, 2011

Matchbook Mini Album Part 2

This is my finished Matchbook Album. I love how it turned! I mainly used Hambly, Prima, & OA (alphas). You can see how to make HERE.

This is the front on the album. I used some Hambly rubons, alphas, and washi tape, October Afternoon Alphas, and Twine.


This is the first page in the album. I used a Hambly overlay, some washi tape, and rubons. Also some Prima mistables.


Next page is of Faith. I used a Hambly rubon, washi tape, and number, Prima flower and center, and OA alphas. The numbers on each page represents their age.


This is Ty. I used a Hambly paper and rubon, Studio Calico paper and rubon, Jillibean chipboard.


This is Noah. I used a Hambly overlay, tape,and rubon, OA alphas, and Lily Bee papers. I love the red!


This is Hannah. I used a Hambly Overlay, tape, and rubon, Prima flower, and OA alphas.


This is Hannah and Ty. I love this picture of the two of them! I used a Hambly paper, rubon, tape, and twine. Love that owl!


This is my 4 blessings. I used a Hambly overlay, tape, and rubon, OA alphas, and Jillibean chipboard.


This is the album all in one picture.

Matchbook Mini Album Part 1

Today I wanted to show you how to make a Matchbook Mini Album. These are great to take with you to show family and friends. Or you could make one and send it to someone as a gift.

First you want to cut your paper 4 x 10 1/2 inches.


Then you need to score it. I have it shown in the picture. There is a top and bottom. You need to score 4 inches from the top and another 1/2 inch past the 4.
Then at the bottom score it 1 inch up and then another 1/4 inch past the 1.


Then you need to pick out your paper. I chose to use some kraft cardstock, Hambly overlays, and Hambly papers. There is no limit on the number of paper you put in the album. I chose 7 pieces. Cut them 4 x 4 1/2 inches.
** You will also need to score the paper 1 inch from the bottom ** When scoring make sure you score along the 4 in side. This makes it easy to bend the papers to look through the album.


Take all the papers and down at the bottom (below the score) take your tool and poke a hole on each side for the brad.


You need to put the brads through the front flap.


Don't put the brad through the back cover.


Here it is closed and finished. All you have to do is alter it and make it your own.

Tuesday, October 18, 2011

The Paper Bakery Banner

I got to play with my Paper Bakery Oct. Project kit. I decided to make my look a little different. I wanted it to say "family". This way I could keep it up longer. I have to say this is my first kit from Sarah and I LOVED it! Her instructions (even thought I didn't follow them completely) were very detailed and very easy to follow!!


Look at the details! Love that white fence! And I just had to use the cute tea cups!

I love that little bingo card and those cute little clothes pins! And see the cute little tag, she included those.

Loved the Family tag!

And I chose to do the word "love" at the end.

Saturday, October 15, 2011

Sweet Peach October Kits

Today is the big reveal of the Sweet Peach gallery!! I really had fun with these kits! I love the variety of paper and embellishments! If you haven't checked them out yet you should. I'm sure you'll fall in love!

This layout was done with the Juicy kit. Just look at those fun, pretty colors. I did some stitching on this layout.


This is another layout I did with the Juicy kit. I really love that green paper! And aren't those flowers pretty!?


This layout you have seen from the blog hop. More details HERE.

This layout was done using the Sweet kit and sketch #2. I was really pleased with the way this layout turned out. I stitched on each stripe.


Friday, October 14, 2011

The Paper Bakery

AUTUMN DAYS, The Paper Bakery's fabulous October Project Kit, is the perfect project for the fall season! Make sure you have your own handmade banner hanging in the doorway for your friends and family to admire until December. When the fall season is over, simply pack the banner away to use again next year! You've got to love that you can use it over and over again. The Autumn Days kits are extrememly limited, so now is the time to try out The Paper Bakery kit club if you are not yet a subscriber. You definitely want to scoop up your kit before they are gone.


Add-on:


I got to be the guest designer this month and her are some of my projects I made with this months add on kit!! This kit was so much fun to play with. Sarah adds some of the most fun unique things in her kits. So make sure to pre-order yours next months.!